My Departement Of Nerdcore Enthusiasm

Tutorials and the like. Things which I have committed myself to. Often linux/UNIX-related.

søndag den 12. maj 2019

Termux: Introduction, configuration and tutorial


Termux introduction

Let me start by saying "Termux is Cool". Termux is the application I have long wanted. Of course, Termux is cool only if you have something to useit fore, but Termux in combination with a USB keyboard can turn a mobile phone in to a fully functional workstation. That however, requires that you can use a Linux command line to perform the work.

So what is Termux? 

The people behind Termux describe it like this:

"Termux is an Android terminal emulator and Linux environment app that works directly with no rooting or setup required. A minimal base system is installed automatically - additional packages are available using the APT package manager."


Termux takes advantage of the fact that Android is already built on a Linux kernel. Termux complements this Linux kernel with a lot of tools and an interface that allows you to have a well-equipped linux environment (CLI) on your mobile phone / tablet.

You have long been able to run a full Linux on an Android device, but it was never straight forward. With Termux it becomes easier and more integrated. You do not have to be root to run Termux.

Termux offers solutions to some problems that I have previously had difficulty finding satisfactory solutions to.

Here I will review some of the benefits I experience at Termux.

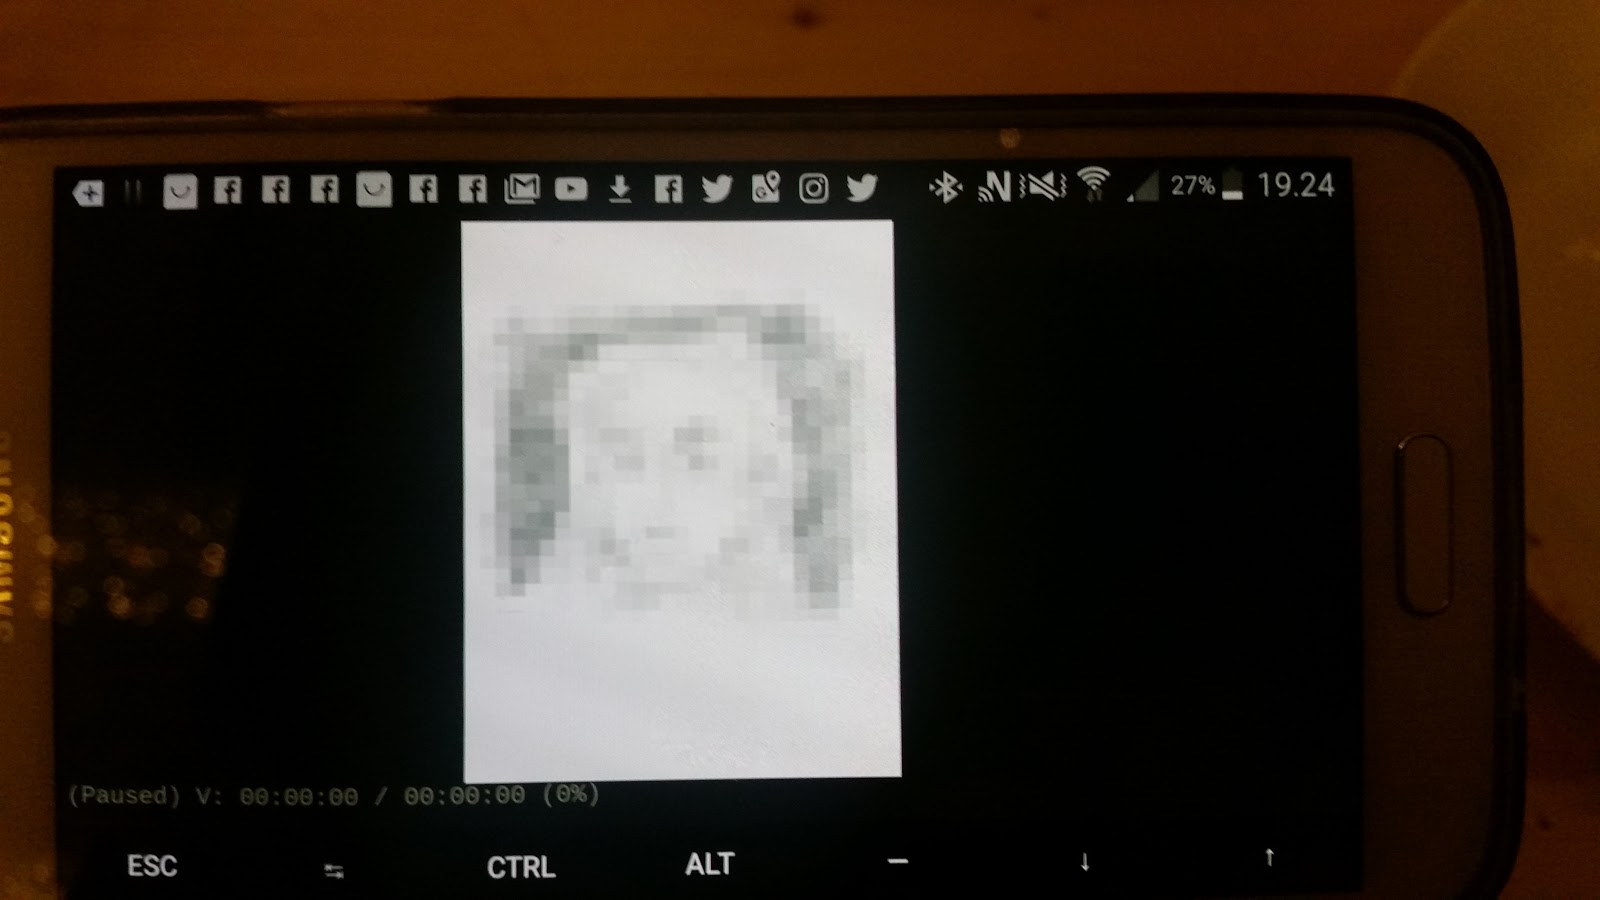
1. View image and video on the console:
I am an artist and I often work with video and pictures and I often use command line (CLI) based programs in my work. (Netpbm, mplayer, ffmpeg)
One of the things I need is to start a video and stop it again without having to take my finger off the keyboard. This is because I do some video editing with ffmpeg from a Linux terminal. In a common Linux environment with X11, one can easily start a video from a Terminal without taking your fingers off the keyboard, but in Android it has always been pretzel. In Termux, this is possible both to display and images and video in the terminal window. Not good quality pictures, but a low resolution version that can be used to quickly check what it is for a picture or to watch a video clip to cut or similar. This can be done with the media player MPV which is part of the Termux packages reposatory. (mpv --no-config --pause --vo = tct https://stallman.org/rms.jpg and mpv --no-config --vo = tct fc4.mp4)

2. Take advantage of the SD card
As long as I have been working on this, it has been difficult to write to the SD card on the phone. That is, the extra space could not be exploited and I had to have an entire Linux system as well as all my files on the phone's very limited internal memory. With Termux the user has a folder in the phone's internal memory and a folder on the SD card that you can write to and read from. It makes it possible to use the SD card as its normal working drive and have all folders and files there so that they do not take up space in the phone's memory and so that there is much more storage space avalable.

Before you can access the various drives, you must execute the command

termux-setup-storage

3. Playing sound
As said when you like to work with multimedia from the command line, it is nice to be able to play an audio file and hear it. It has been difficult in the various Linux solutions I have used before. With Termux this works like a charm. There are to two commands to play sound i Termux. One is the media player MPV that I have just mentioned. The other is a dedicated audio player called play-audio.

4. Super good integration with the Android system
It all works seamlessly. You do not have to set up language separately, everything seems to be closely integrated with the rest of the system, which makes the system quick and easy to access. Termux can be installed as a common app from the play store and it does not even take up a third of what it takes to install a full Linux distribution that I have done before.

Last but not least.

5. Community
Termux has a community. You can find conversations, WIKI pages and tutorials on most aspects of Termux. This means everything when you need to get to know a system and to costumize it..

It was the five significant advantages that make me right now very excited about Termux over other Linux-on-Android solutions. Now I will briefly introduce myself and my approach to the area. Then I would like to thank the developers behind Termux and then I will start by showing how Termux can be set up and adapted to a well-functioning Linux environment on your mobile phone.

I am a Linux enthusiast since I first heard about Linux which was in 1999. Since then, I've been trying to install Linux in many variants on every possible PC. When Android came I started experimenting with creating a Linux environment on Android and by doing this I built myself a solid practical experience base. For a period I was more inclined towards the Raspberry Pi and I experimented with building a small, energy-efficient workstation.

In the transition to 2019 I put aside the Raspberry Pi and tried again to look at the possibilities of running Linux in a terminal on Android and it was here I came on the track of Termux which I had not heard of before.

Well it was a little about me. Now I would like to give a big, warm thanks to Fredrik Fornwall and the whole group behind Termux. In fact, I also think there must be a thought for Kevin Boone who developed KBOX Linux on Android long before Termux was there. Kevin Boone carries out the idea of copying a Linux system on top of existing Android / Linux system that already exists on Android.

Configuration and customization

One of the nice things about Termux is that it just works out of the box. You will find it in playstore (or F-Droid) and install it and then it is ready to use.

Although the app is ready to use right away, it is not really useful until it is customized.
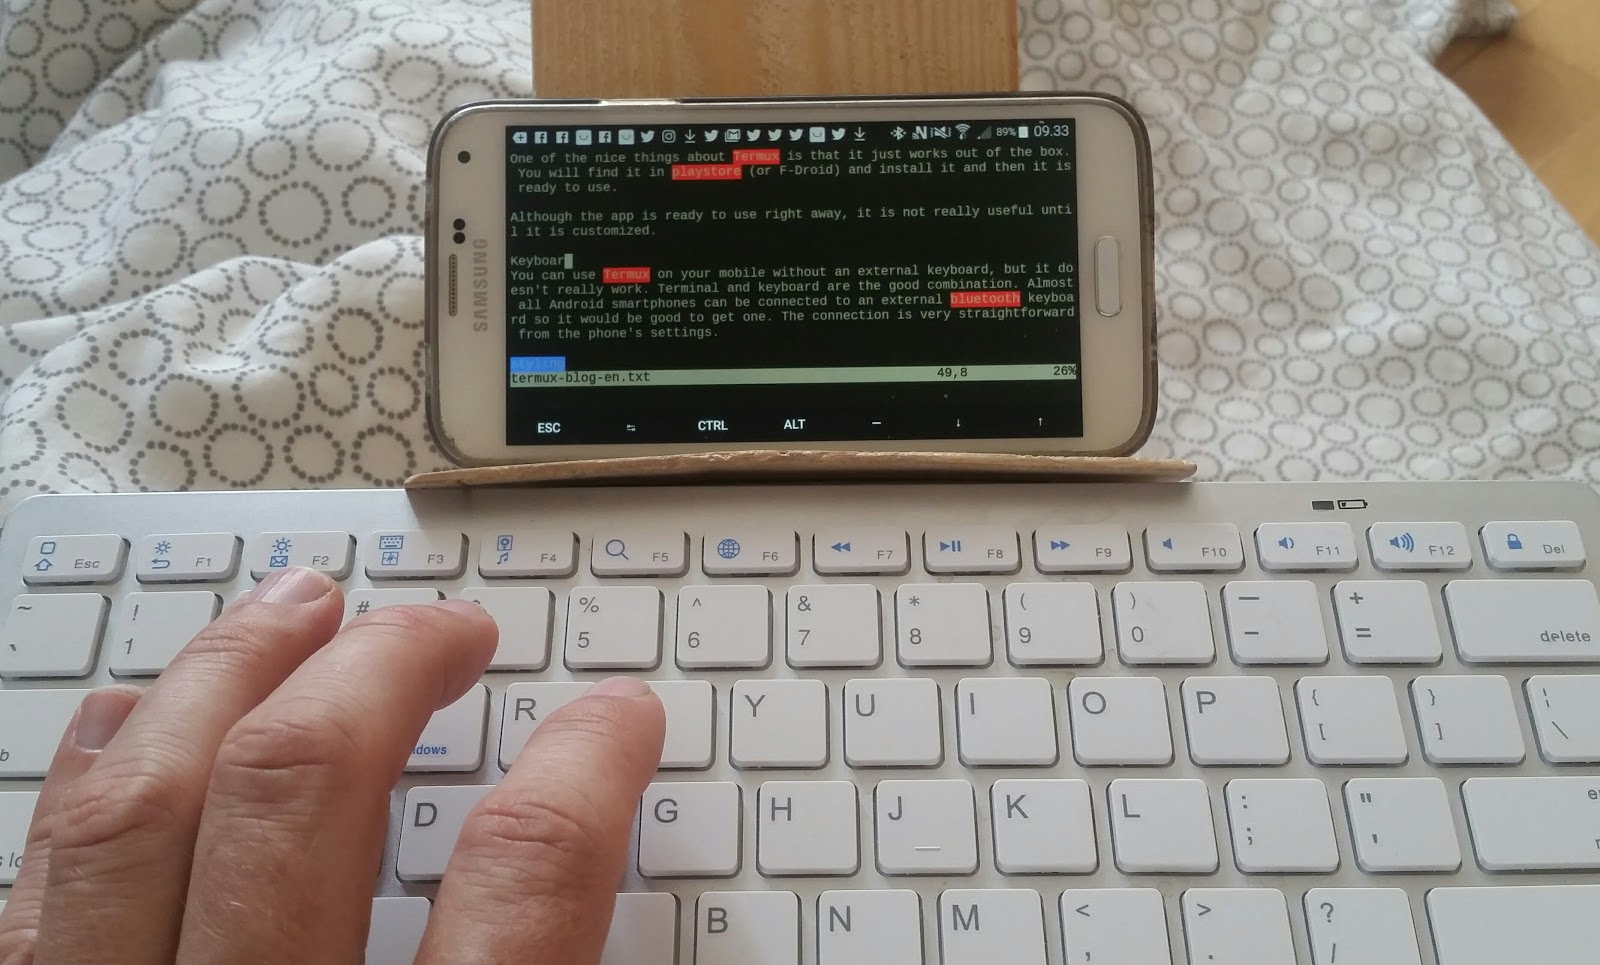
Keyboard
You can use Termux on your Android device without an external keyboard, but it doesn't really work. Terminal and keyboard are the good combination. Almost all Android smartphones can be connected to an external bluetooth keyboard so it would be good to get one. The connection is very straightforward from the phone's settings.

Styling
Black white terminal is just a little monotonous and uninspiring to look at, especially if you have to spend hours working in it every day. I've got a dark green background and a light green font. It's nice and comfortable to look at ... Well but how to get some colors.

You need to play-store (or F-Droid) and install Termux: Style it costs 3-4 dollars. Once installed, you can start the Termux and long-press the screen

more -> style

Then you get a lot of color options to choose from and a lot of fonts and then you can choose the one you like best.


Applications

First it is good to have the environment updated so run the command

pkg update

If you want to install some programs then you can do it with

pkg install

so if you want to install vim which is a super good text editor (which, however, takes some time to learn to use) then just enter

pkg install vim (enter)

Files and Folders

Basically, Termux provides two folders where you can put your own files and create sub-folders. The one is on the phone's internal storage and the other is on the phone's SD card.

The first is:

/data/data/com.termux/files/home

It's your home directory

The other is:

/data/data/com.termux/files/home/storage/external-1

And that's your folder on the SD card

Well, before you can get this to work, run the command:

termux-setup-storage

and then say "yes" to Termux having to access the various storage areas on the unit ..

System path and Bash

Now we have to look at some setup of the local user environment in the system. We need to add a new folder to the system path.

What is the system path? The system path is a list of folders that the system looks for executable files in. If you execute a text command such as "ls" then the system checks whether there is an executable file with that name in one of the folders in the system path.

You can add a folder to the system path. I need to add a folder to my own scripts so I can call a script through its name from anywhere in the system.

If we are to see the system path then we can do that by typing the command:

echo $ PATH

Here is the output from the command before I add a new folder.

$ echo $ PATH
/data/data/com.termux/files/usr/bin:/data/data/com.termux/files/usr/bin/applets:/data/data/com.termux/files/home

I want to add the new folder using a setup file called

.bashrc

As you can see, the file has a dot to begin with. Files starting with a dot are hidden files in Linux. That is, you cannot see them with a regular "ls" command. But you can see them by adding a flag to the "ls" command.

ls -a

displays hidden files.

there is no .bashrc file in Termux to start with so you have to create it yourself in your home directory which is what you start in when you open Termux (/data/data/com.termux/files/home)

first I just create the folder I want to use for my scripts

mkdir inpath

Then the "inpath" folder is created

Now I need it added to the system path so I can use my scripts from anywhere in the system. Therefore, I now create a file called ".bashrc" in my home directory.

I use my favorit editor "vim", but you can also use "nano" and others. I am typing:

vim .bashrc

then vim opens with an empty file and you must now insert / enter a few commands in the file. These commands will be executed each time you open Termux.

Then insert the following text into the file. (Termux supports copy and paste, just long press screen and select paste)

---------------------------
---------------------------
export PATH = $ PATH: /data/data/com.termux/files/home/inpath;

if [-f ~ / .bash_aliases]; just
. ~ / .Bash_aliases
fi
---------------------------
---------------------------

Once you have entered / inserted these lines, save the file.

It is the first line, ie the one that starts with "export" which makes sure to add my own folder to the system path. The next 3 lines are about something else. They are about loading a file with some aliases. What aliases are and how they work you can check out yourself on the web. Right now I just want to say that we need an alias for our navigation in the system. We would like to be able to quickly get back to our home directory no matter where we are in the file system. For that we must use an alias. But first we need to create a new file called ".bash_aliases"

---------------------------
---------------------------
alias home = 'cd /data/data/com.termux/files/home'

# Add your own aliases gradually
---------------------------
---------------------------

Once you have made the file you can save it and then you can close Termux by typing "exit" and then press enter x 2. Then you can reopen Termux and now you should be able to return to your home folder from any place in the file system by typing

home (enter)

And the inpath folder has now become part of the system path so you can execute the scripts in the folder from anywhere in the file system. However, there is a package you need to install before you can make your shell script work properly.

pkg install termux-exec

Once you have installed the thermux exec, your shell scripts should work fine.

It was all for this time. I hope I get time to return with more Termux tutorial.

søndag den 16. september 2018

DIY Speaker for Dance Events

A small presentation of a DIY speaker I have built myself. I've built it to take out when I'm going to teach dance or if I'm doing a little dance show or maybe a party in a place where there's no sound system. The speaker is energy efficient and can make great sound powered on just a 12 volt battery. There are two videos the first one focus on of the speaker. The other one focus on the amplifier. The amplifiers of a particular type of Class D amplifier called T-amp or Class T amplifier or the Tripath chipset Class T stereo amplifier. 


Inspiration I had for this project

https://www.instructables.com/id/Battery-Powered-Mobile-Party-Sound-Systems/

The TNT BFB a.k.a... The Big Fun Box
http://www.tnt-audio.com/clinica/bfb_e.html

søndag den 2. september 2018

3.5 inch HDMI touch display  review / recommendation

I have tried severely small screen for my Raspberry Pi project "Noteypi". This one is really the best. 

It is named KeDei and it can be found on AliExpress for varies prices. The cheapest I have found is 22 $ with free shipping. It is not advertised under it's brand name it is offered under the name. 

"3.5 inch HDMI LCD TFT Touchscreen Display  for Raspberry pi 2 and Pi 3 Model B"

or 

"raspberry pi 3.5 inch hdmi LCD touchscreen touch screen 60 fps high speed 3.5inch better than 5 inch and 7 inch"

It can be recognized on the pictures by the connection to the Pi witch is split in two as you can see on the picture here below. Most other products have the connection as one block covering all the GPIO of the Raspberry Pi


As I said it is the best of the many 3.5" and 5" screens around in my humble opinion. Especially when it comes to touch precision. 

It is a resistive touch screen as oppose to the capacitive touch screens. Most of us have gotten used to capacitive touch on our smart phones and tablets. A capacitive touch screen uses the static electricity of the body to locate the position of the finger on the screen. A resistive touch screen uses a pressure point. This method gives much higher precision so it is more suited for precise on screen drawing witch I find interesting. Most other 3.5" and 5" screens I have tried have some problem when it comes to drawing on screen. The line wobbles caused by some electronic inconsistency. This one rarely wobbles and is over all fast and reliable to work with. It is excellent as a hand drawing device. I made my install based on Noobs. I followed some manuals and got the touch screen to work but I never got the screen calibration to work with this set up. That means that I have calibrated my touch screen manually by adjusting x-width x-height y-width y-height in a setup file. Hard work but I did learn something from it. I use the screen at a resolution of 720 x 480. That is a good compromise. If resolution is to low it is almost impossible to use the screen because the programs interfaces take up to much space on the small screen. I can highly recommend this product. As for on screen keyboard may I recommend "onboard". It works very well with the setup an support local languages.


søndag den 11. september 2016

DIY repair, cello broken neck


Okay, the DIY repair described by this blog post, I've had to revisit because the crack broke up again. I have since made a new intervention on the cello, which seems to work well. The dokumentation og this new intervantion I have a link to here. It takes the form of a google album with comments. Visit the album here.

I repaired this cello for my girlfriend. It is not her "fine" cello, but a cheap one (still a lot of money in my opinion :-)) she bought to teach with. Just after she had bought it, it broke. 
The neck broke for no apparent reason. I could see that it had been broken there before and glued. Since the cello seemed to be very old, the glue probably dried out and lost it's grip. Anyway, I wanted to try to repair it and my girlfriend decided to let me experiment because it would have been expensive to take it to a violin shop to be repaired.

This is not a real tutorial because I am certainly no expert in this field. I just wanted to post the images of the process for inspiration purposes. Some important things do not appear in the pictures and are therefore explained underneath.


I found a good youtube tutorial and there I could see that the violin builder in the video took the fingerboard off and glued the cello's neck and afterwards drilled two holes from above and put two thick wooden dowels of maple through the already glued cello neck to strengthen it. He then put the fingerboard back on. 


It is probably the correct way to do it, but I could not do it this way as I did not want to take the fingerboard off for several reasons. I had to find another solution. I have experimented a bit with building loudspeakers where you often use polyurethane glue - a foaming glue to join the speaker boxes together. I thought about using the same adhesive for the cello as it is very strong and since it can expand and fill out any gaps between the two pieces of wood. My plan instead was to drill a hole which was larger than the dowel into both sides of the wood and to then compensate for the gap by using the expanding glue. The larger gap would make piecing the parts together easier and more precise. When I got round to the gluing I put a lot of glue on the dowel and lowered it into the hole and hoped that to glue would expand enough to bind everything together properly. I have since found out that it's a good idea to put a bit of water on the surface that the glue should adhere to (only one side needs the glue on it), but I did not know this during the repair and I guess it makes no big defference. I opted to make only one big dowel instead of two also in order to make the adjustment easier. Since I could not get hold of any maple wood, I used a piece of beech which I had from an old kitchen surface. Beechwood is similar to maple as it is very hard and strong. I sawed a square rod out of beech that was around 25cm long and 15mm wide on each side. Then I planed the edges of the rod so it was fairly round. I took a small nail and hammered it into the middle of the broken neck where I thought the dowel would sit the best. I clipped the head of the nail off with a pair of pincers just a few millimeters above the surface. (A boat builder once taught me this method). I then pressed the pieces together so that the nail could make a mark at the same place on both sides. Then I could use these marks as a guide for drilling the holes. I used a hand-powered drill (brace and bit) with a 16mm flat drill bit. I drilled by hand as it was easier to keep track of the process and as it does not make any noise. It is also kinda dogmatic and sensual and old skool :-).

Ideally you would let the polyurethene glue bubble out of the cracks and holes as it dries and then remove it all when it has dried completely. However, I definitely wouldn't want to do that on this fragile instrument so I carefully dried away the glue each time as it bubbled out so as not to damage the surface of the wood.

The operation went well it seems. Here is a small video where my girlfriend is playing the cello. 

tirsdag den 17. december 2013

The counter rotating script for video editing


A demo of a small set of scripts I've made for counter rotating a video clip. I call it

The counter rotating script for video editing

The script is help full if you have a video recording where the camera have been rotated back and forth while recording and you want to stabilize it or counter rotated it either clockwise or counter clockwise back to an almost stable, realistic view-orientation.

Background for the scripts
On the fourth of October 2013 in the city of Aarhus (in Denmark) a good friend of mine took a very hand-held recording of my 20 minutes long solo performance "Stoned" while I performed it live. The pictures were very beautiful, but the camera rotates during filming. If the beautiful recording should be used for something I had to find a way to contra-rotate it so you could watch the video in a fairly horizontal orientation all the way through. It was not only about rotating the video recording from eg landscape to portrait format. That would have been an easy task, but here the rotation had to happen along the way so it hat to be continuously counter-rotated. When I was doing "Dance of a Newsboy" an earlier peace (2012), I spent an incredibly long time to make an a homemade method to zoom in a video sequence which had already been recorded. A reasonably advanced interactive shell script that I think is the coolest piece of programming I have so fare made. As soon as I got my recording of "Stoned" home in October I started "coding". I would expand the old script so it could both rotate and crop the video sequence. Before the process starts I was writing all the "frames" of the video clip out as images. There is a 20-minutes of video recording and there are 24 frames per second. Overall it gets to over 30.000 images. All of these images are now added extra padding at the top and bottom so they are 100 percent square (1280 x 1280 pixels). It provides a good starting point to rotate them. I started to make these scripts back in October and now I'm done with the coding and have started to rotate and crop the thousands of images.

How it all works
The script treat 96 images at a time which corresponds to 4 seconds . The five pictures illustrate the process . What is is not visible from these still images is the dynamic flow from image to image embedded in the script, but the pictures illustrate fairly the steps it goes through. This process can perhaps be compered to steering through a video recording with a flight simulator, if that makes any sense :-). I hope that I can "manage" my way through all 30,500 pictures/frames before December 1 where I will start on an new education.

The original image is "lying down". It is in the format 720p (1280 × 720 pixels)


Here the picture is made ​​squareA "compass" is put upon the imageAn angle value can then be entered for rotation of the image. Don't worry you do not rotate each and every image separately. The script process 96 images in one operation corresponding to 4 seconds of video.


Now the image is upright.


The next phase is cropping. This is governed by a coordinate system consisting of a lot of small numbers in the image. There is a frame that can be placed in the image by entering the coordinates of the frame's upper left corner. This is not either done for each image separate, but for 96 images at a time. It has a starting value and other value to where the frame should end after the 96 images and then the cropping wanders gradually from one position to the other over the 96 images in one operation.

The finished cropped image is slightly smaller than the originalThe format is called WSVGA and is 1024x600 pixels.

A video that demonstrate how it is to work with this script.
If you want to skip the introduction stuff jump to time: 6.27 (on the video timeline)


fredag den 5. april 2013

Small, simple, simplistic and aesthetic, PHP and HTML guest book


This blog post presents a small guest book solution that you can implement on your own website. By guest book, I mean: An opportunity for people who visit the website to post comments and read others comments on the page. The solution consists of a single PHP/HTML page and a plain text file to store the written comments.

Screendump


I have long been fond of making bash shell scripts (Linux) on my computer and so I have a basic understanding of programming. I also tried to code in other languages, but here I have not yet achieved the same level of understanding and skill, therefore I am so proud and happy that I manage to get as much control over the PHP-codes and syntax that I could code this guest book for my website. A guest book that looked and acted like I wanted it. The solution I came up with I would like to share with you whom might be interested. For inspiration for making your own solution or to directly use my solution as it is on your own website.

As I said the guest book only uses one page. It has input facility and the view of previous posts on the same page. It is a completely open guest book, anyone can write in it without lock-inn or registration. Managing the guest book is done by editing the text file in which all messages are stored. This will typically say: Download the file, edit it and upload it again. (If you use Linux/UNIX, you can automate this process by creating a script where you use eg wput and wget to upload and download the file from the server).

I would like to explain the basic principle of the PHP code for this guest book. The trick is that there is an "if-statement" in the very beginning of the PHP-code that says

"If there is something in the variable "post" then add this content to a specified text file. If there is not then just load the specified text file and show it on the page."

When the page loads the first time, there is nothing in the post variable it is not until there is someone who has completed the form and press the submit button underneath that there will be anything ind the "post" variable. Therefore the script simply loading the specified text file and displays it on the page. Now when someone completes the form at press the submit button the page will be loaded one more time but now there is something in the "post variable" and therefore that content is written to the specified text file as stated in the if-statement in the beginning. Then the page is loaded one more time but now the post variable is empty again and therefor we go back to first case scenario where the guest book is simply loaded into the page.

I do not think I can explain the approach as simple and easy to understand as I would like, but I just do want to state that this approach in my opinion, is the guiding principle in the coding of this guest book. This is the principle which makes it possible to receive input from the user and display the guest book content at the same page. The rest of the PHP code is just about retrieving input from the user via an HTML form and adding this input to a specified text file.

If you want to use this guest book solution on you own website you can download the source code to it from here. Your server must support PHP for it to work but the vast majority of servers does that already. The source code is packed as a zip archive so you will have to find a way to unzip it before you can start to work with it.

PHP and HTML in interaction

If you want to use this guest book on your own website it will indeed be nice if it fully integrates into the design of your website. Therefore, I would like to review how you can put the PHP code of the guest book into the HTML code of your own HTML page.

So HTML and PHP are two different types of codes. A little simplistic, one can say that HTML can be used for presentation while PHP can be used for manipulation (actions.. changing things.. etc..). PHP makes it possible that what the user enters will be added to a specified text file where it can be stored and that the file is loaded into the HTML document. HTML makes the design and look of the page. PHP and HTML work very well together. You can put PHP code into the HTML document at (almost) any place in the HTML code. You use a PHP-tag when you want to insert PHP code in the HTML document. The tag looks like this:

<?php ... PHP code ... ?>

Pages which are primarily driven by PHP are often given file extension ".php" although they also contain HTML code. I like to start my PHP pages exactly as I start my HTML pages namely with a DOCTYPE definition and some initial HTML code. The PHP codes I insert further down in the document. I have made a small illustration of how I've sorted my PHP code in relation to my HTML in this solution.


There is a minimal version of the guest book with a minimal amount of HTML code. You can open that file (gbdemostrip.php) in a text editor and select and copy the two blocks of PHP code and the HTML form which is the code between the:

<form method="post" action="">
and the
</form>

The two tags included.

and paste them into your pages HTML-code in the appropriate places. After that, all you need to do is to upload the specified text file demoposts.txt and your own PHP/HTML page with the guest books PHP-code to your server then it should work.

The striped down version of the guest book you can download her as a zip fil (you will need to unzip it first)
You can download the archive here

I also made a small zip archive with a working demo of the guest book to upload and try out right away on your own server. The archive consists of four files. gbdemo.php, demoposts.txt, demobilled.png and englematch.css. If you upload the four files to your server and go to the file.

gbdemo.php

with your browser. It would look something like this:

http://www.myhomepage.org/gbdemo.php

you should have a working guest book solution on your own website.

You can download the archiv here

A small note about character encoding.

Character encoding is an interesting topic in it self that I do not want to go deeper into here. Here I will just say that the text in your documents no matter whether if it is pure texts or an HTML page or a java script can have different encodings. It is recommended that you use the encoding called UTF-8 because it is the most modern, international and flexible encoding. For some reason I could not get UTF-8 character encoding to work on my server. Therefore I have chosen to go with the older standard called iso-8859-1 so therefore all the elements used for my version of the guest book iso-8859-1 encoded. I just wanted to point this out. It is quite easy to change this if you want to when you have just found out how it works.

I wish you much joy and inspiration

onsdag den 13. marts 2013

Balancing sound recording


I would like to share this with you although I guess it as usual are very few that would have any interest in it. The reason I want to tell you about it is firstly, because I think my solution to this sound balance problem is very unorthodox and fun. Secondly because I think the result was surprisingly good. It still freaks me out a how much I was able to improve the quality or maybe more correct the "perceivability" of the interview.

I have to say that I am a happy Linux user and that this little project is made on a Linux platforms with basic open source software for audio and image processing.

Let's look at the problem.

It is an interview conducted over Skype. And the problem is very simple. One voice is the voice of the woman who ask the questions in the interview. Her voice comes through loud and clear. The other voice is the voice of the woman being interviewed. Her voice comes through so quiet that you can hardly hear it.

Here is a screen shot of the audio file opened with Audacity. It is obvious how one voice gives large fluctuations in the graph while the other ones gives tiny fluctuations in the graph.


I would like to try if I could balance the sound level in the two voices in proportion to each other. The first thing I found out was that I could increase the volume of the quiet voice if I in Audacity (a sound editing program) selected the piece that has low volume and only that piece. That is the piece which I in the illustration here above has identified as the "Voice B". Than after selecting it I ran a so called normalize effect on it. After doing only that the sound of voice B, the one that was so quiet would suddenly come though laud and clear. I was so surprised and happy about this discovery that I made a short video about it.


So therefore, if I could do this all over the interview which lasted about an hour I would probably be getting a fine balanced interview where you could hear both voices. So I started to do that manually and it was a little laborious process and at the same time it was also difficult to make it uniform so I started thinking about whether or not this process could be automated. I looked around for an already existing programs that did this same thing and I found one that was called The Levelator® and I tried it, but for some reason it gave absolutely nothing to my audio file. As I thought more about it, I got a picture in my head that it could be cool if I could make two complimentary soundtrack of the interview, one where only the strong voice is heard and where there is silence on all the parts where the quiet voice is speaking and one where only the quiet voice is heard and where there is silence in all the places where the strong voice is speaking. Then I would be able to open the two soundtracks in Audacety together and be able to treat them individually in relation to each other.

I thought it would be an easy task for a computer sound engineer to make a program that could do that. A program that could register when it was a period of tiny fluctuations in the graph and when it was a period of big fluctuations in the graph. But I am no computer sound engineer. I am not so strong in audio on the computer, but I have worked a lot with images and video on computers and as I thought about it the idea of turning the sound stream in to a video stream started to take form in my mind. The idea that I might be able to make sound into video and the video in to a series of images and then make an algorithm based on measurements of the images.

There are for Linux / Unix a small command line based program for playing audio files. This program is called "play" and it is part of a program suite called SoX which is for command line based manipulation of audio files.

When "play" plays a sound file it also display some meta information while running. It shows a time indicator but it also shows a small sound level indicator.


Now, if I could shoot this little indicator while it was playing the interview with 24 frames per second I would be able to print this video into a series of images which could show exactly how loud the sound is at any given time.

So I hope you are with so far. The idea is that I make a little video recording (screen recording) of the small volume indicator's movement while the interview is playing. This video I print out to a huge amounts images one for each frame in the video recording. Each of these images contains accurate information about how loud the sound is at a given time in the recording. This information can be read from every single image in the series by a human being, but now I want to find a way that the computer also can read or calculate this information on its own so that the process can be automated. There are two parameters that I would like to have the computer figure out. One is a precise time. The second is the state of the sound level indicator at that particular time.

OK first the time parameter because that is the easyest. If I create a script that count its way through the series of images then the number it has reached in the counting can very easely be calculatet to a time messure. There are 24 images per second so you can just devide the number by 24 then you have the time in seconds.

But how do we get the computer to read the sound level indicator?

Netpbm is the name of a package of command-based programs for image manipulation. It is a software I use again and again and therefore I also know its possibilities really well.

I knew that in the netpbm program suite there is a program called "pnmcrop" which can remove all same colored edges of an image. So, if you have a black image with a white star in the middle then "pnmcrop" remove all the black from top, bottom, right, left side of the image until it meets some of the white pixels from the star in the middle. Like this:

Before pnmcrop

After pnmcrop

I also knew that the netpbm program suite had a program that could be used to measure how large an image was in pixels (pamfile).

The neat thing about the netpbm program suite is that all the programs in it are command line programs which means that they can be put into a script and used to automate workflows.

So I record a little video of "play" playing the interview sound file. This can be done by making a screen recording or a screen cast and there is again an excellent command-line program that can be used for this purpose. This program is called ffmpeg.

In the picture below I define the area I want to record of the screen. As you can see, it is a very small area.


When this is written out to images instead of video it produces a huge amount of images (24 per second). The images looks like this.


Now I use pnmcrop on the five images here above to cut all black away from the right and only from the right side the images:


You can see the image are different in width in accordance to the scale of the little volume indicator.
 As I said, there is also a program in the netpbm program suite that can measure a picture width in pixels. So now I have all of a sudden a setup that can give me an exact figure for the sound level measured in pixels at an exact point in time. So I would be able to create a simple conditional statement:

If the image is greater than 314 pixels wide than it is voice A speaking. If it is less than 314 pixels wide, it is voice B speaking.

Now 24 time measurements of a second is too high a level of detail for what I want to do so I made a small script that collected the images twelve and twelve. Here I also use a program from the the netpbm program suite in the script to put the images together twelve and twelve (pnmcat).


Now each image represents half a second. It's a little easier to work with and I can still do the same algorithm to crop from the right and measure precisely how the sound level is for just that given half a second.

So I made a few shell script to automate this.

The first script produces a list with exact time measurement for every time the interview switch from voice A to voice B and vice versa.

5
8
9
14
19
23
24.5
26.5
29.5
31.5
32.5
36
36.5
43
43.5
54
55.5
58
77.5
78
192.5
etc...

The script is here if anyone want to see how I make that in practice. (Sorry the comments are in danish. If you don't understand danish you will have to use google translate or analyze the meaning out of the code it self)

The next script takes this list and producer from that the two previously mentioned complementary soundtrack. For this I use SoX and ffmpeg.

Finally I open the two audio tracks in Audacity and adjust them relative to each other and then I mix them down to on track again.
The result has been really good and the process have been really inspiring.

/Mikkel


Note to those who wants to experiment with this in practice.

Although I have split the voices into two tracks there are still some transitions where the strong voice patches the weak voice tracks. In particular, I found out that the shift from the strong voice to the weak almost always put a little less than a second of the strong voice on the weak voice track. To counteract this, I tried to move the timeing of all the shifts one second forward in relation to the soundtrack. I did this by removing 24 photos from the start of the process where the many small images is collected twelve and twelve. It was a very easy place to do it because I just need to change a number. The starting point in the script. I just counted that 24 counts up. So if 145 is the image that comes closest to the audio file starting point I will instead start 24 images ahead in the series so that image 169 will be the starting point.

When moveing the timeing of the shifts a second forward in relation to the audio file there ware much less patches from the powerful voice on the weak voice soundtrack, but there was still some. I've found that the best results was achieved by leveling these "spots" into alligenment with the fluctuations of the rest of the track on the quiet voice track. I have done this manually in Audacity. It takes me about 20 minutes to do this manually in an interview lasting about one hour. I zooms into the graph so much that 25 seconds fills my whole Audacity window. Then I use the arrow at the end of scroolbaren in the bottom of the Audacity window to move forward in the soundtrack. As soon as I see a fluctuation which extends above the average very low level on the soundtrack I mark it and use

Effect -> Amplify

To turn down the volume on this place and reach the level of the rest of the track. When I'm done with this process, I have a track where all fluctuations have the same low rate and the board looks quite uniform without anything sticking up in any places. Then I run

Effect -> normalize

on the track. It makes a really strong impact. The entire track is enhanced significantly and so I do not need to do anything alse. The second track, with the powerful voice I don't change at all. When I manually have eliminated all "ridges" in the quiet tracks and run

Effect -> Normalize

on the entire track I can just export the the two tracks together and then I have the finished audio file where the two voices can both be heard loud and clear.